How to Use Red Light Therapy on Your Face?
Red light therapy has become a popular at-home skincare practice, but using it well requires more than switching on a device. This guide explains how to use Red Light Treatment Face tools safely, realistically, and consistently. It focuses on preparation, treatment timing, device placement, and practical aftercare. The goal is healthier-looking skin, not instant perfection.
Before treatment, wash your face and remove makeup, sunscreen, and heavy creams. Dry skin helps the light reach the surface evenly. Follow the manufacturer’s instructions for distance and session length. Many devices recommend several minutes per session, a few times weekly. Do not stare directly into bright LEDs. Use suitable eye protection when the instructions require it. Keep the device clean, especially around the nose and chin, where oil can collect.
Clinical research suggests red and near-infrared light may support skin appearance by influencing cellular activity and collagen-related processes. Results differ between people. Fine lines may look softer, while redness or uneven texture can take longer to change. It is not magic. I would also avoid promising dramatic results after one session; that expectation often leads to disappointment. Take a clear photo before starting, using the same lighting each week. Skin can appear better simply because the room is brighter. That detail matters.
People with photosensitive conditions, light-triggered disorders, or certain medications should ask a qualified healthcare professional before use. Stop if you experience persistent pain, unusual swelling, blistering, or severe irritation. Consistency matters, but so does reflection. If your skin reacts badly, reassess the routine instead of forcing it.
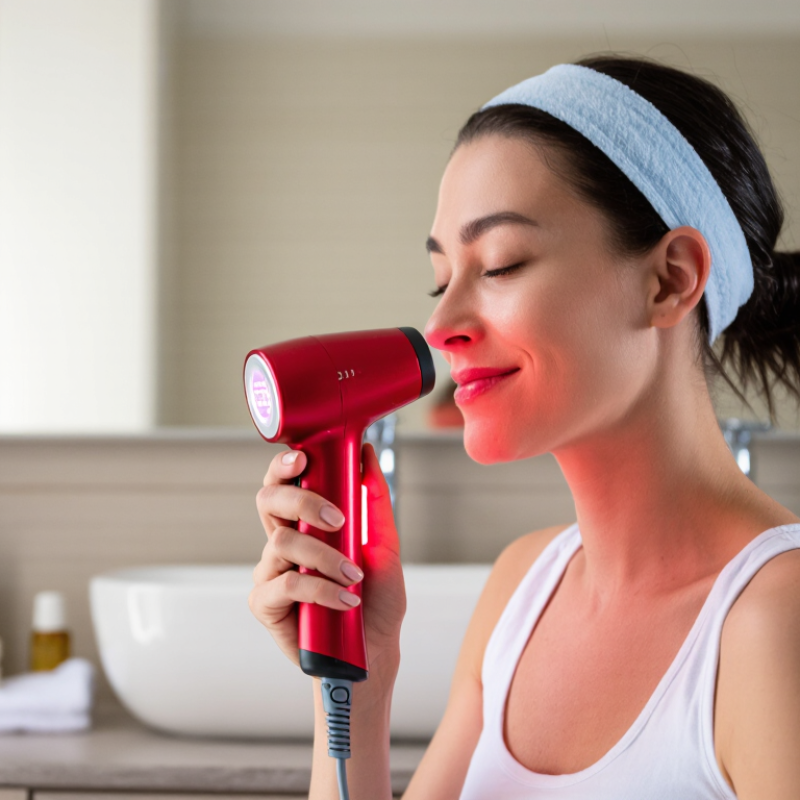
Understanding How Facial Red Light Therapy Works
How to Use Red Light Therapy on Your Face?
Understanding How Facial Red Light Therapy Works
Facial red light devices shine specific wavelengths onto the skin. Red light reaches relatively shallow layers, while near-infrared light may penetrate farther. These wavelengths are studied for photobiomodulation, a process in which light may influence cellular activity. The exact effects depend on the device, treatment schedule, and individual skin.
Not a quick fix. Research suggests possible benefits for skin texture and the appearance of fine lines, but results vary and evidence is still developing. Light does not work like a peel or scrub; changes, if they occur, are gradual. A device’s wavelength and power matter, so follow its instructions rather than assuming every product works the same way.
Before a session, remove makeup and use the device on clean, dry skin if its instructions recommend that. Keep it the specified distance from your face, and use eye protection when directed. More time is not necessarily better. Stop if you notice persistent redness, discomfort, or eye irritation. People with light-sensitive conditions, or those using medicines that increase light sensitivity, should ask a qualified healthcare professional before treatment. Even careful routines have limits. Red light therapy should not replace medical care for a skin condition, and honest expectations matter.
How to Use Red Light Therapy on Your Face? — Understanding How Facial Red Light Therapy Works | Topic | Practical Guidance | What to Know |
| How it works | Facial devices emit visible red light, and some also emit near-infrared light. Follow the device instructions for placement and use. | Light-based treatments are being studied for skin-related uses, but results can vary. Red light is not the same as ultraviolet light. |
| Before a session | Clean and dry your face, remove makeup, and check the device instructions. Use only a device intended for facial use. | Do not apply products or combine treatments unless the device instructions or a healthcare professional say it is appropriate. |
| Eye protection | Use the eye protection supplied or specified by the manufacturer, and keep your eyes protected as directed. | Do not stare into LEDs or assume that closed eyes provide adequate protection. |
| Session length and distance | Follow the device’s stated session time and positioning. Different devices have different output and recommended use. | There is no single session duration or distance that applies to every device. Longer exposure is not automatically better. |
| Frequency and consistency | Use the device only as often as its instructions recommend. Keep a simple log of sessions and any skin reactions. | Any visible changes may take time, and results are not guaranteed. Avoid increasing frequency to try to speed up results. |
| After a session | Resume a gentle skincare routine if your skin feels comfortable. Stop using the device if you develop persistent irritation. | Seek professional advice if a reaction is severe, persistent, or concerning. |
| Who should seek advice first | Ask a healthcare professional before use if you have an eye condition, a condition that increases light sensitivity, or take medication that may cause photosensitivity. | Also ask for advice if you are unsure whether the device is suitable for your skin or health circumstances. |
| Realistic expectations | Consider facial red light therapy an optional skincare approach, not a replacement for diagnosis or treatment by a healthcare professional. | Evidence and device specifications vary. Be cautious of claims that promise guaranteed or rapid results. |
Choosing a Suitable Device and Reviewing Safety Guidance
Choosing a face device requires more than checking its light color. Clinical protocols commonly use red light near 630–660 nanometers and near-infrared light near 810–850 nanometers. A 2023 systematic review in Photodermatology, Photoimmunology & Photomedicine found potential benefits for skin repair, but also noted inconsistent treatment settings. Results are not guaranteed.
Look for clear wavelength data, treatment time, irradiance, and eye-protection instructions. Avoid devices that hide these details. “Stronger” is not automatically better. A useful session should feel warm, never painfully hot, and should not leave lasting redness. Take a baseline photo beside a window, then compare after several weeks. Daily changes are easy to misjudge.
Safety deserves more attention. The American Academy of Dermatology advises discussing light-based treatments with a dermatologist, especially when using photosensitizing medicines or managing conditions affected by light. Follow the device’s distance and timing guidance. Use supplied eye protection when recommended. Stop if you notice blistering, severe irritation, vision changes, or unusual pigmentation. I would also question impressive before-and-after images; lighting and camera exposure can exaggerate improvement. Home treatment feels simple, but the evidence remains uneven.
Applying Red Light Therapy According to Device Instructions
Before using a red-light device, read its instructions from start to finish. Devices differ in wavelength, distance, session length, and recommended frequency. More time is not automatically better. Wash off makeup, cleanse your face, and dry your skin unless the manual says otherwise. Sit or lie in a comfortable position, then place the device at the stated distance. Keep your eyes protected as directed. A warm glow is normal; pain, strong heat, or persistent irritation is not a goal. Stop and check the instructions if discomfort occurs.
A 2014 clinical study published in Photomedicine and Laser Surgery examined red and near-infrared LED treatments in 112 participants, using sessions twice weekly for four weeks. That schedule describes one study, not a universal home-use plan. Follow your device’s schedule instead, and do not copy a clinic protocol onto a different product. Consistency matters more than improvising. Keep a simple log of dates and any redness or sensitivity; it is easy to forget what happened. Results can be gradual, and the evidence varies by device and skin concern. If you have a skin condition, take photosensitizing medication, or are unsure whether light exposure is appropriate, ask a qualified health professional before starting. No need to push through a bad reaction.
Tracking Skin Responses and Adjusting Your Routine
How to Use Red Light Therapy on Your Face?
Red light therapy should be treated as a measured skincare experiment, not a quick fix. Begin with clean, dry skin and follow your device’s stated distance and exposure time. Take a baseline photograph beside a window. Keep the same angle, lighting, and facial expression each time. Record redness, tightness, dryness, breakouts, and sensitivity after every session.
A 2014 randomized study involving 76 adults reported improvements in skin texture and collagen-related measures after repeated red and near-infrared light treatments. However, results varied between participants. A 2021 systematic review in Photodermatology, Photoimmunology & Photomedicine described the evidence as promising but inconsistent, partly because devices and treatment schedules differ. That uncertainty matters. If your cheeks feel hot or unusually tight, reduce session frequency rather than pushing through discomfort. Persistent irritation deserves professional assessment.
Tips
Start with two sessions weekly for three weeks, unless the instructions advise otherwise. Use approved eye protection when required. Avoid adding strong exfoliating acids or retinoids on the same evening initially. Check your notes after 21 days, not after one dramatic selfie. If your skin remains calm, add one session weekly. If dryness increases, pause and simplify your routine. A small mistake is treating “more light” as “better results.” Keep the experiment boring, consistent, and easy to review.


